Tag: mellieha cave interior
Photos
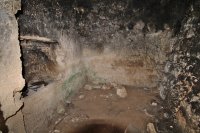
Second Chamber of the Fourth Mellieħa Cross Cave
The second chamber of the fourth cave below the Mellieħa Cross, with rock-cut niches visible on the left.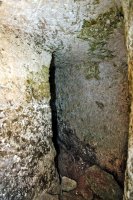
Deep Corridor Inside the Fifth Mellieħa Cross Cave
A narrow inner corridor inside the fifth cave below the Mellieħa Cross, showing worked limestone walls and a confined rock-cut passage.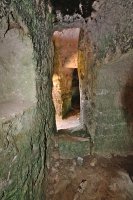
Another Corridor Inside the Fifth Mellieħa Cross Cave
A narrow passage inside the fifth cave below the Mellieħa Cross, showing worked limestone walls and a deeper corridor beyond.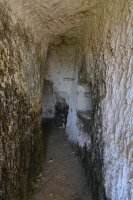
Narrow Corridor Inside the Fifth Mellieħa Cross Cave
A narrow rock-cut corridor inside the fifth cave below the Mellieħa Cross, with worked limestone walls and small niches.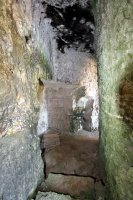
Interior Corridors of the Fifth Mellieħa Cross Cave
Inside the fifth cave below the Mellieħa Cross, showing a chamber with narrow rock-cut corridors.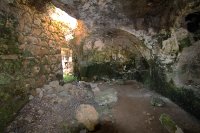
Interior View Toward the Entrance of the Fourth Mellieħa Cross Cave
Inside the fourth cave below the Mellieħa Cross, looking toward the entrance and a roof area that appears partly collapsed.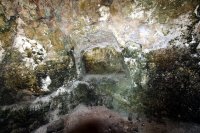
Cut Niche Inside the Fourth Mellieħa Cross Cave
A close view of a carved niche in the limestone wall of the fourth cave below the Mellieħa Cross.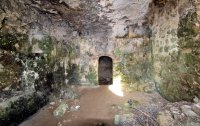
First Chamber of the Fourth Mellieħa Cross Cave
The fourth cave below the Mellieħa Cross, with a passage to a second chamber and worked niches in the limestone walls.
Animal Shelter Setup in the Third Mellieħa Cross Cave
The second chamber of the third cave below the Mellieħa Cross, with partitions suggesting later use as an animal shelter.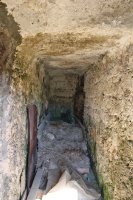
Narrow Corridor Inside the Third Mellieħa Cross Cave
A narrow rock-cut corridor inside the first chamber of the third cave below the Mellieħa Cross.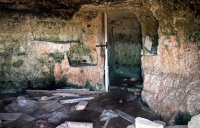
First Chamber Inside the Third Mellieħa Cross Cave
The first chamber of the third cave below the Mellieħa Cross, with cut niches, rough limestone walls and visible later debris.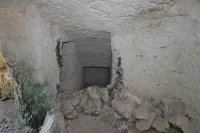
Passage to the Lower Chamber of the Second Mellieħa Cross Cave
A cut passage inside the second cave below the Mellieħa Cross, leading down into a lower chamber.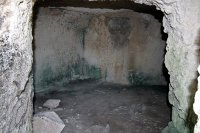
First Chamber Inside the Second Mellieħa Cross Cave
The first chamber of the second cave below the Mellieħa Cross, showing worked limestone walls and a dark interior space.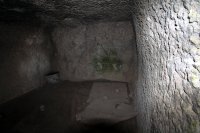
Third Chamber Inside the Mellieħa Cross Cave
The third chamber of the first cave below the Mellieħa Cross, showing worked limestone walls and a dark enclosed interior.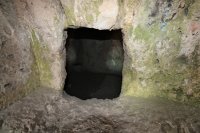
Cut Opening to the Third Chamber of the Mellieħa Cross Cave
A small cut opening inside the first cave below the Mellieħa Cross, leading into a darker third chamber.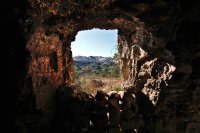
View from the Second Chamber of the Mellieħa Cross Cave
Looking out from the second chamber of the first cave below the Mellieħa Cross through a rough limestone opening.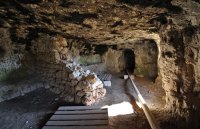
Second Chamber Inside the Mellieħa Cross Cave
Inside the first cave below the Mellieħa Cross, looking toward a second chamber with stone walls and cut rock features.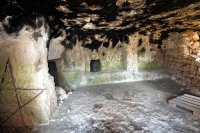
Interior of the Mellieħa Cross Cave
Inside a rock-cut cave below the Mellieħa Cross, showing carved niches, stone walls and weathered limestone surfaces.Keywords
sailor hands
girl looking at sea
turtle head
inner citadel terrace at mycenae
busy bee
retro motorbike
easter rabbit
nostalgic city mobility
museum
travel dog
gilded stucco
hillside theatre
winter christmas ecard
european military truck
rooster portrait
peaceful bird images
scuba mum greeting
collectible father’s day art
rural valley
expedition vehicle
snowflakes
lake cruise
lace design
traditional boat
vintage postcard
palace frescoes
easter card
shingles fish
alpine architecture
marble seats
butterfly malta
small fish
holiday artwork
small birds
coast
digital mother’s day greetings
reptile thailand
field birds
cat in valletta
image
athens corner building
nesting dove
scenic sunset malta
cave houses malta
snail texture
bird images
garden design
rugged 4x4 truck
galleon
cultural heritage